These days, it's hard to imagine a world without the internet and Wi-Fi.
We’re not fans of all those cables, but we sure love browsing the web. Most devices are wireless, and we get most of our information online.
So, what exactly is a basic access point?
For example, a Teltonika TAP100 can be considered as such. It’s a Wi-Fi device that operates on the 2.4 GHz band, and it’s easy to install and set up.
Why does the Teltonika TAP100 and the 2.4 GHz Wi-Fi band remain a popular choice?
Perhaps it’s because they offer 24 months of free remote monitoring? It’s also worth noting that most wireless cameras and IoT devices still use the 2.4 GHz band. According to current scientific understanding, the higher the Wi-Fi frequency, the smaller the area it can cover. This is why the 2.4 GHz frequency band will likely remain a viable solution for quite some time.
What is the 2.4 GHz frequency good for?
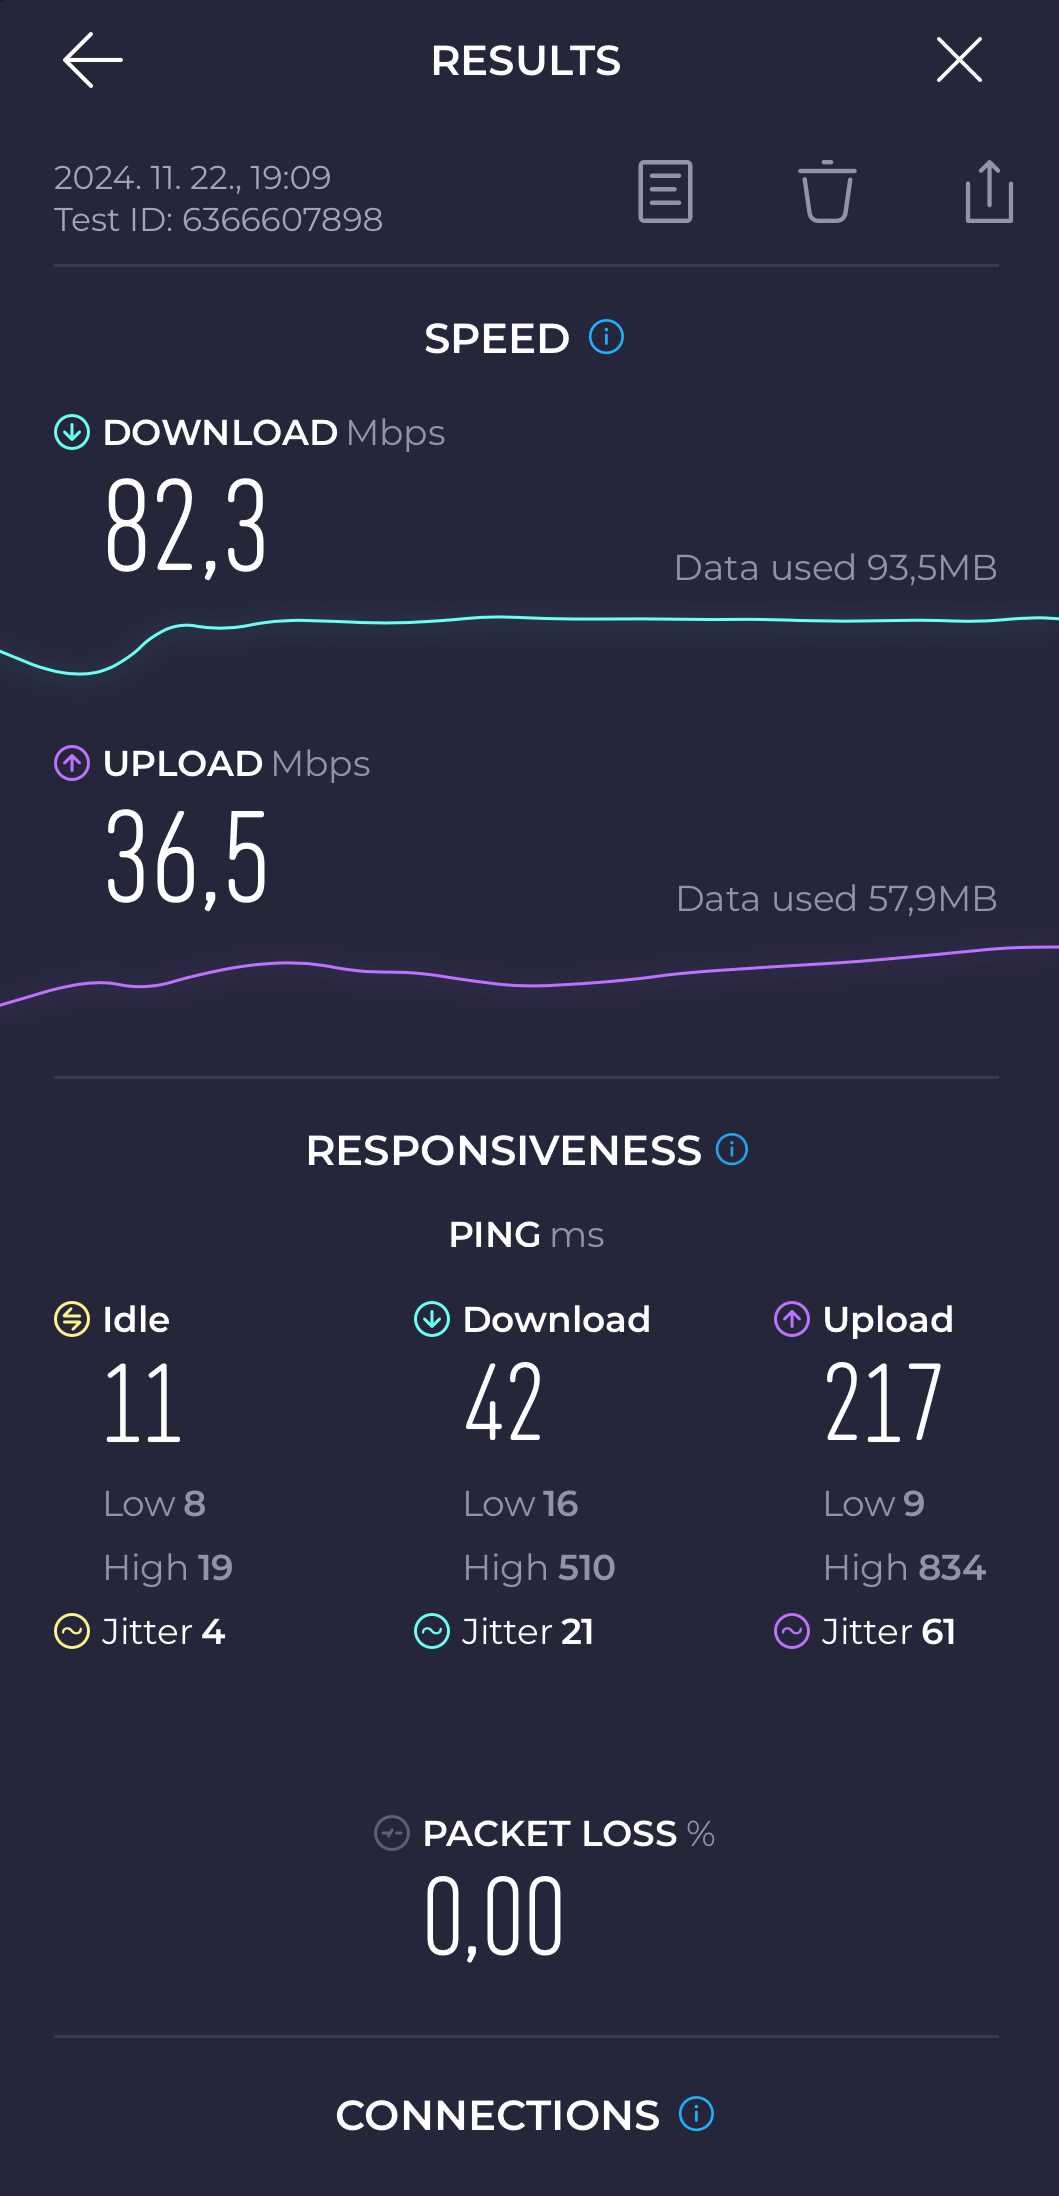
The most common test we use is a speed test. At first, it doesn’t seem like much, right?
Actually, it is! Just think about it – this type comes with a 10/100 Mbps LAN connection.
In comparison, this speed is perfectly fine and of course decreases as you move away from the access point, but where 5 GHz is no longer available, 2.4 GHz still works. For general use, which is what most users will be concerned with, the slower speed may be sufficient.
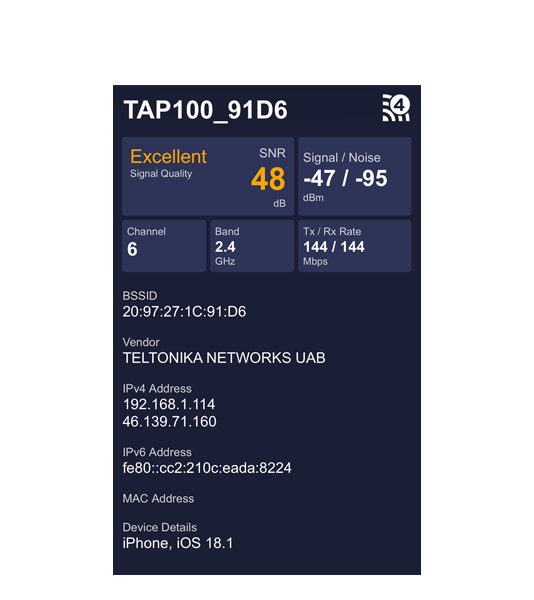
Let's also look at the technical background of the system!
The signal quality is excellent, calculated by the test program on the basis of the signal-to-noise ratio. The "Tx/Rx Rate" refers to the modulation and the number of spatial data streams, which is an important piece of information.
What is it exactly?
This value indicates the connection rate between the access point and the client. It is not equal to the maximum data throughput and differs significantly from speedtest results! For example, if a 2.4 GHz product has 300 Mbps on its data sheet, it indicates that this is the maximum data link speed that can be achieved when there is minimal interference, the highest channel width and the highest modulation level. If you are calculating for a local area network, 144 Mbps is plenty for several 8 megapixel cameras and many IoT devices.
RADIUS server setup on Synology NAS
All that's left is to set up a more secure Wi-Fi network. Instead of the usual SSID and password, we will use a more modern authentication. To do this, you will need a RADIUS server and the EAP method on the access point side.
What exactly should we use?
The RADIUS (Remote Authentication Dial-In User Service) server receives requests from clients wishing to connect. This information is sent by the access point using the Extensible Authentication Protocol (EAP), the server then authenticates the users and returns whether the client is authorized to connect. The access point will only allow the connection if it has been previously approved by the RADIUS server. Furthermore, since the device does not store any credentials at all, it only forwards them, it is completely useless to attack it, as it does not have any sensitive information. It only records a shared secret key that provides authentication between the server and the Wi-Fi device. There are several authentication methods available, username/password pairs, certificates, multi-factor authentication and a fair amount of encryption. In this example, we will use the simpler username/password pair, which is also more secure than a pre-shared password.
First, we need to download the RADIUS server using the Synology NAS package manager, if it is not already installed.
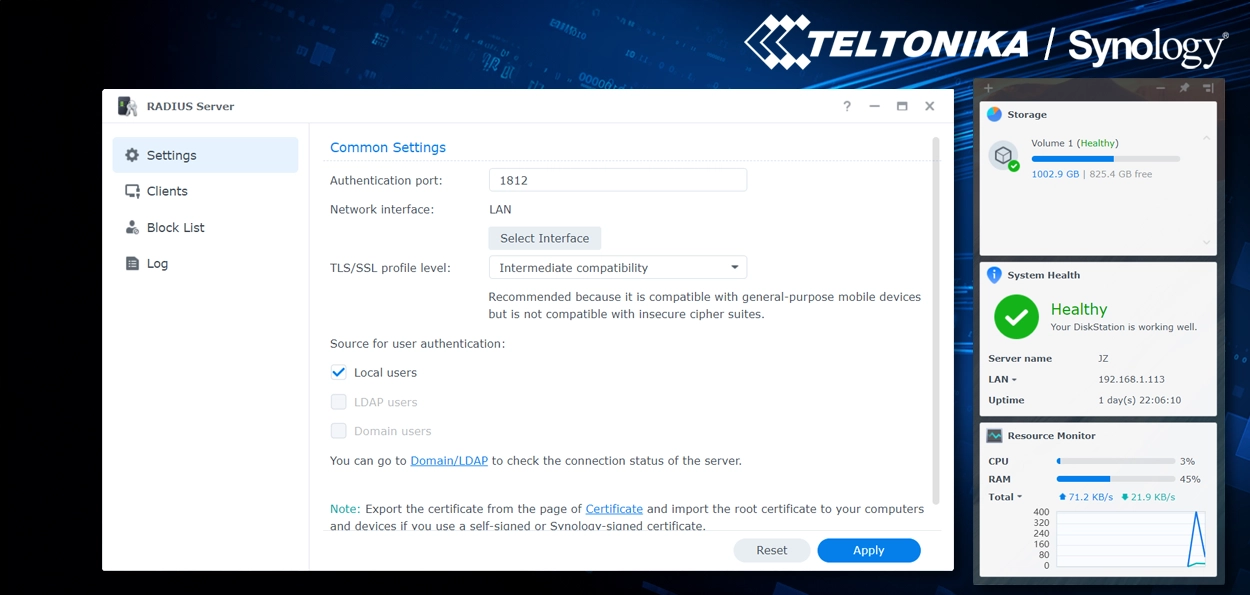
These default settings should be fine, of course they can be changed to suit your needs. What you need to specify is what database the RADIUS server should use, otherwise it would not be able to authenticate clients trying to connect, and no one would be able to use the network.
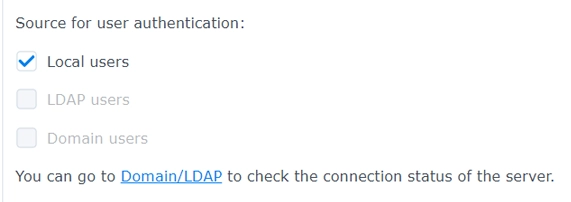
For the sake of simplicity, in this case the database will be based on "Local Users", which means that the username/password pairs registered in the Synology NAS will be able to connect. On the "Clients" tab, it is important to create entries, as these fields are empty by default.
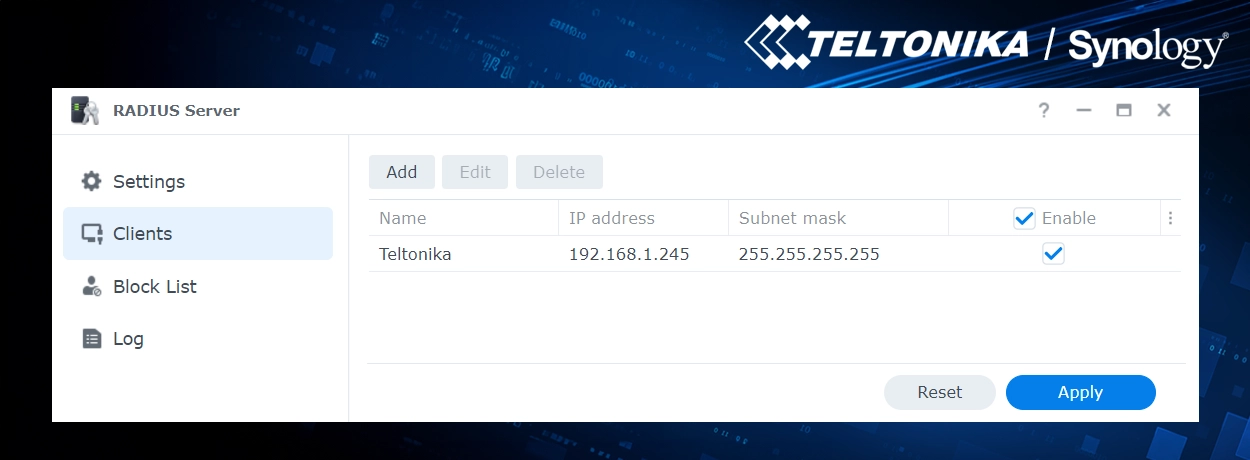
The "Name" field is optional. The shared secret key is a password, and the example in the image is strictly not to be followed! The "Source IP" means that you can specify one network device or in the case of multiple devices, you can select the whole subnet. In our case, this is the IP address of the Teltonika TAP100. Setting up the access point is no more difficult. In the "Networks/SSIDs" tab, select the EAP encryption, which can be WPA3-EAP, it depends on which clients will be connected, because unfortunately not all of them fully support this option.
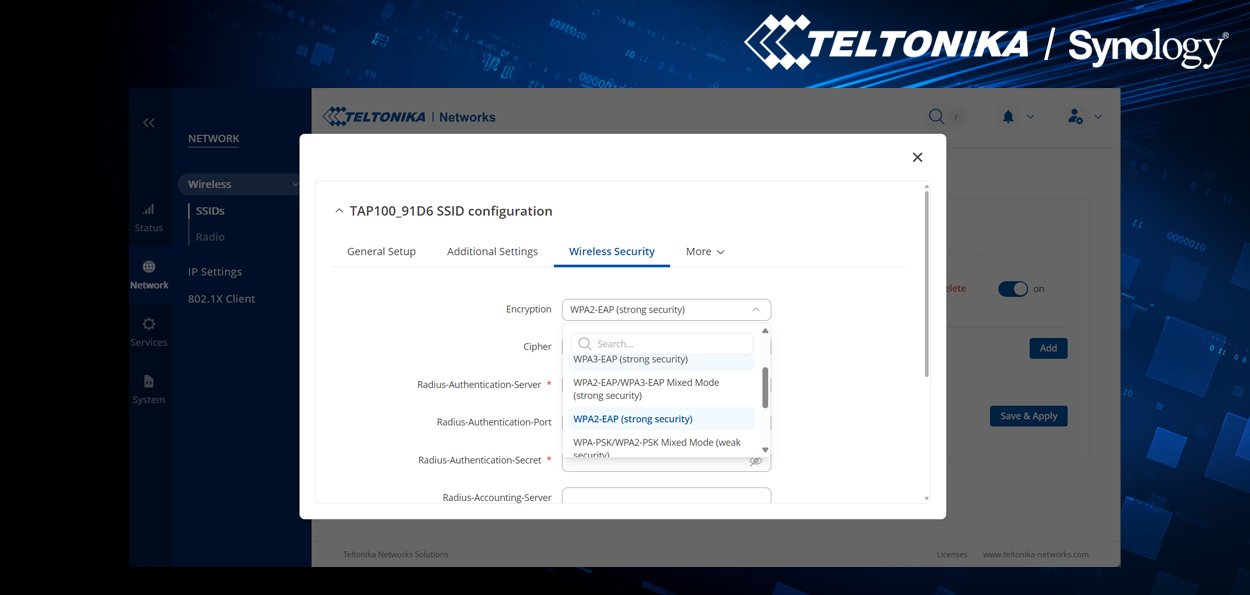
"Cipher" can remain set to "Auto", fields marked with an asterisk are mandatory, the rest are optional.
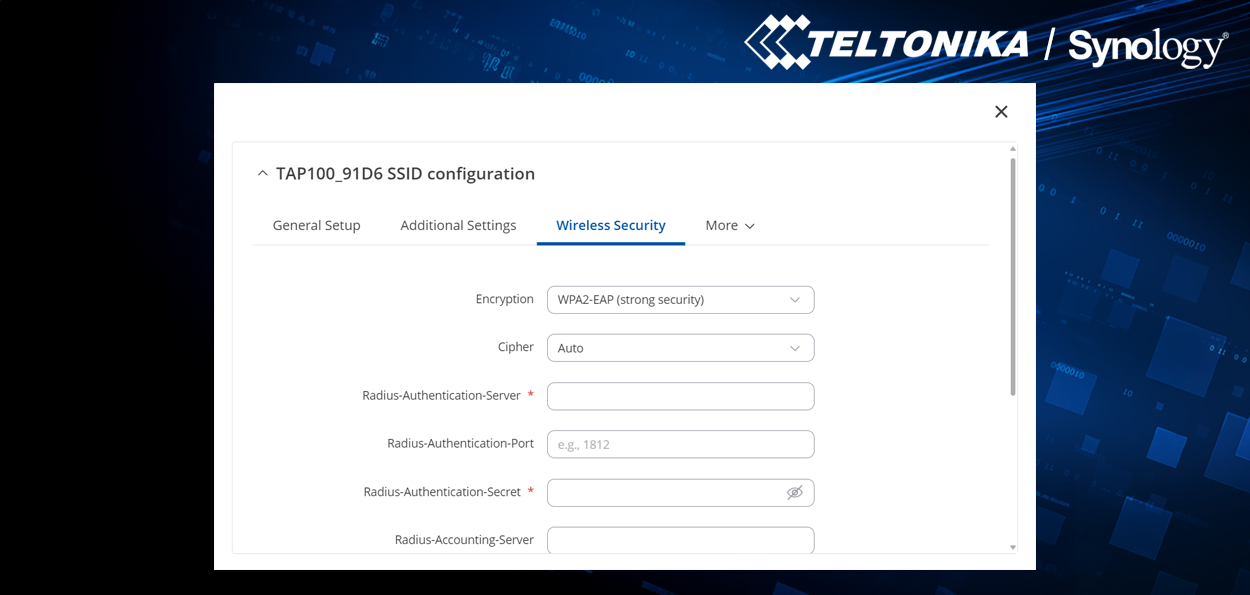
The "Radius-Authentication-Server" is the IP address of the Synology NAS, the "Radius-Authentication-Port" is the value left at the default NAS configuration (1812), and the "Radius-Authentication-Secret" is the shared secret key that was previously specified. All that remains is to enable and save the settings. After that, the test is ready!
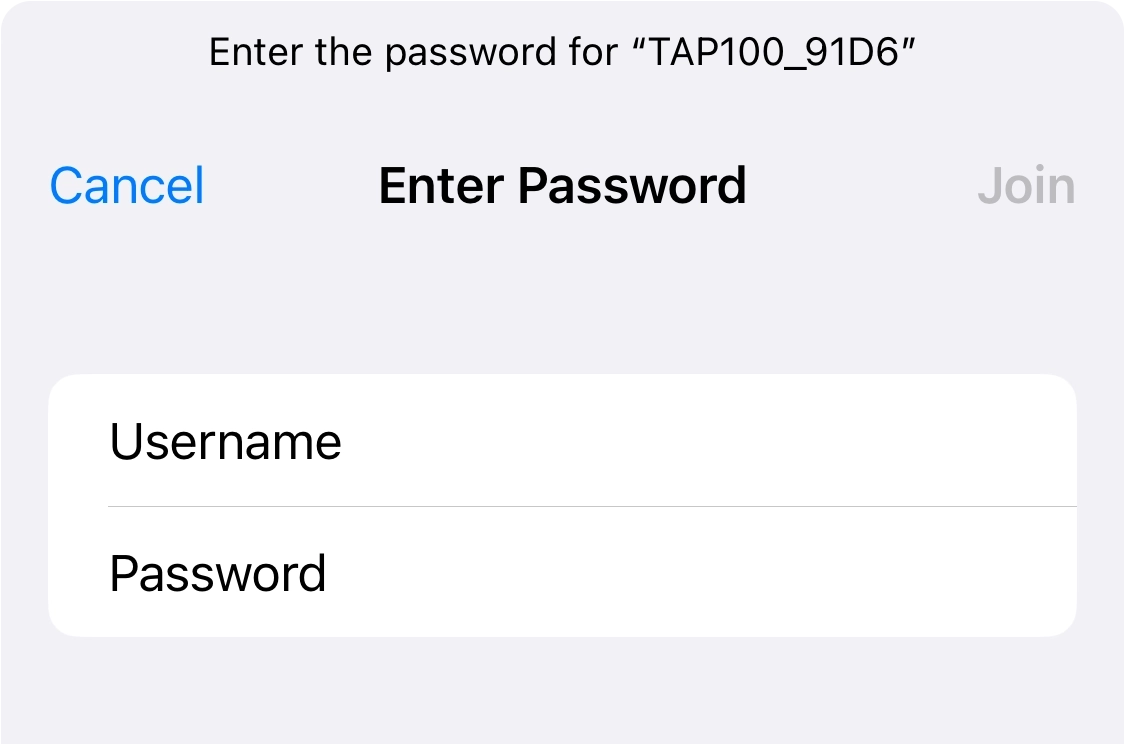
If we try to connect using a mobile phone, we get the following picture. This is normal, as the expectation is that the client is authenticated. In this step, the user data previously created on the NAS must be entered.
Since the access point is not able to decide on the authorization, it forwards the information and waits for the RADIUS server to respond. There is no need to wait long and the authorization is done quickly, provided of course that no false data is attempted. For general use, which is what most users are concerned with, slower speeds may be sufficient.
What is the reason for this?
This is perfectly normal, as the certificate is valid and issued by the Let's Encrypt provider. It can safely be considered trustworthy, so it can be accepted with confidence.
Why would we accept it if it indicates that it is not reliable?
The reason it says this is because the RADIUS server setting is not the domain name – which it can't be – but the internal IP address of the NAS.
If this is very confusing, you can install the certificate on all connected devices, use the hotspot feature, the external RADIUS server, or set a self-signed certificate for the local IP address of the NAS.
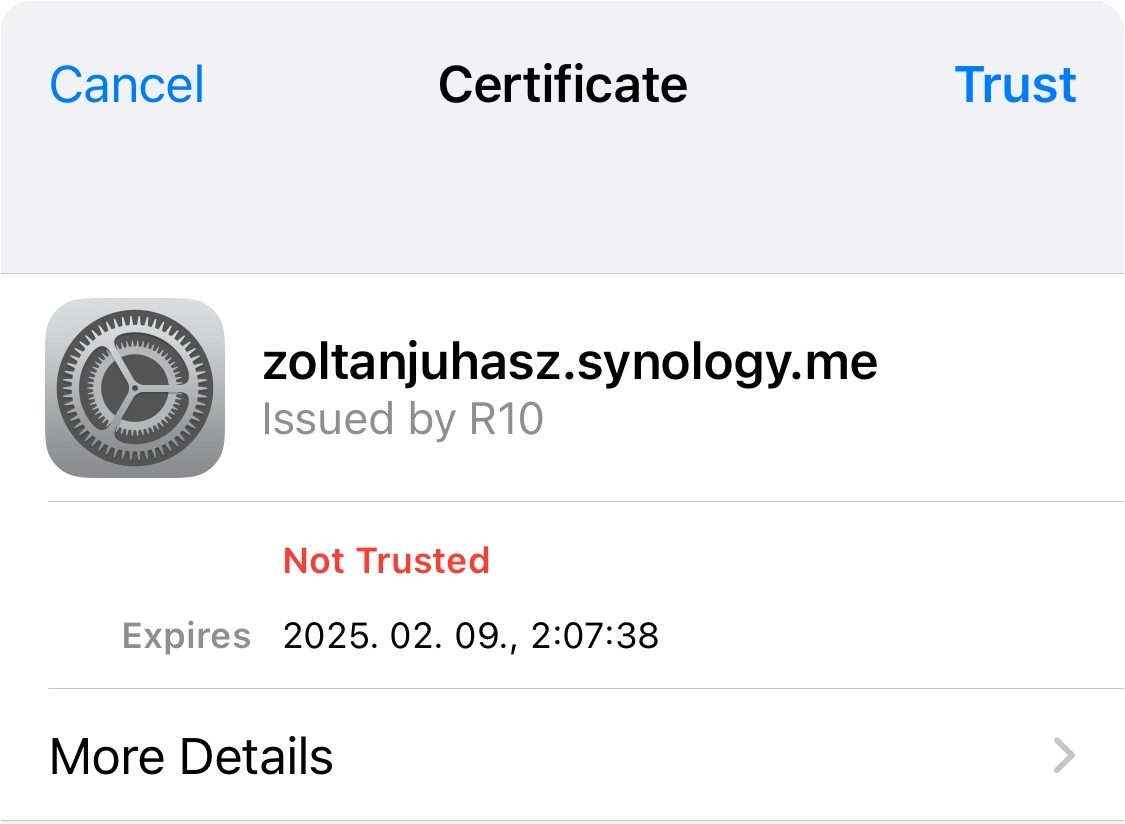
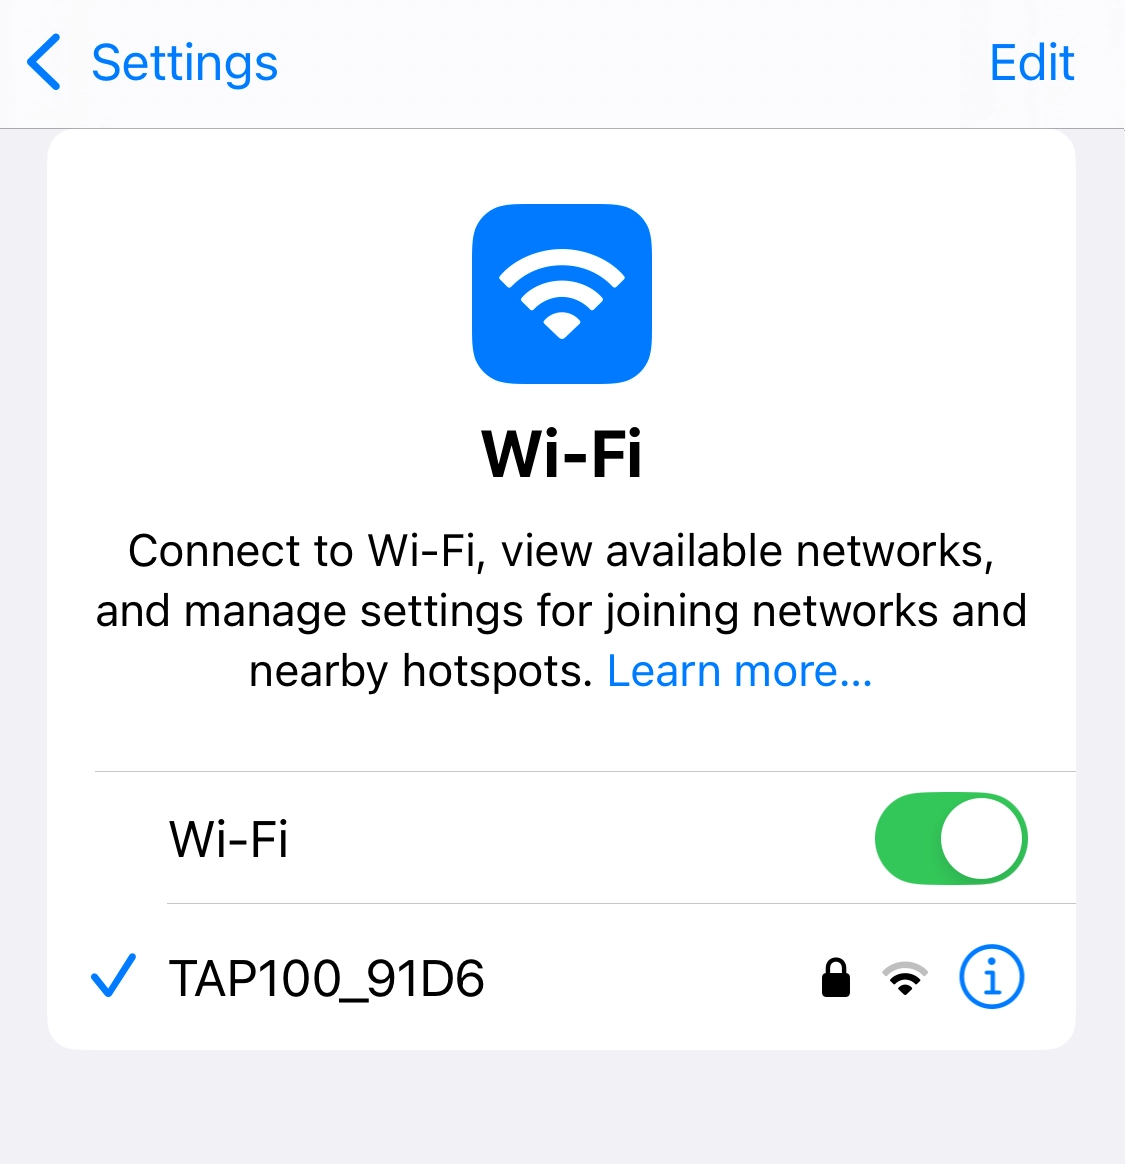
Once this is accepted, the connection is successfully established, and you can perform the desired operations on the network according to the configured rules. Of course, it is also important to change your passwords from time to time. If speed still proves to be insufficient, in that case the Teltonika TAP200 is also a good choice.
Wi-Fi connectivity and security in one!
You can even have a fully cost-effective, self-monitored Wi-Fi system that's absolutely right for not just your home, but also a small office. Thanks to this, convenience is not sacrificed for security.
For more information, please contact your Sales Representative or write to Us: kereskedelem@powerbizt.hu


